I’ve had many sensory bottle ideas floating around in my head for quite some time. Now, I’m not sure if I can stop making them.
I had foot surgery at the beginning of June, so it’s been a pretty uneventful summer since. What better way to spend my time than immersing myself in preschool Pinterest projects?
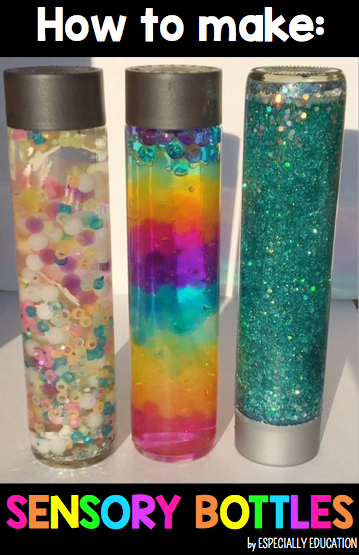
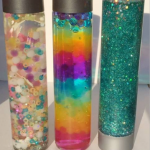
These DIY calm-down jars (as they are also known) are seriously addictive, even more so since I made them in my three favorite colors: rainbow, glitter, and glow-in-the-dark. I’ll give step-by-step directions to make your calm-down sensory bottles, listing the materials, tips, and pros/cons.
First up:
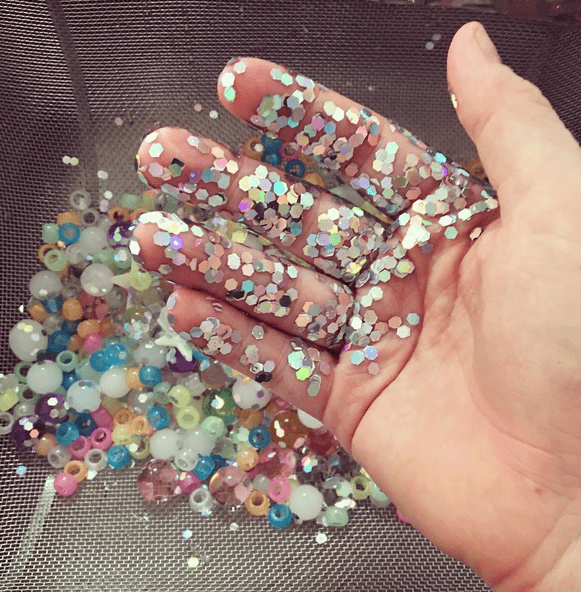
The Glitter Whirl-Swirl Sensory Bottle
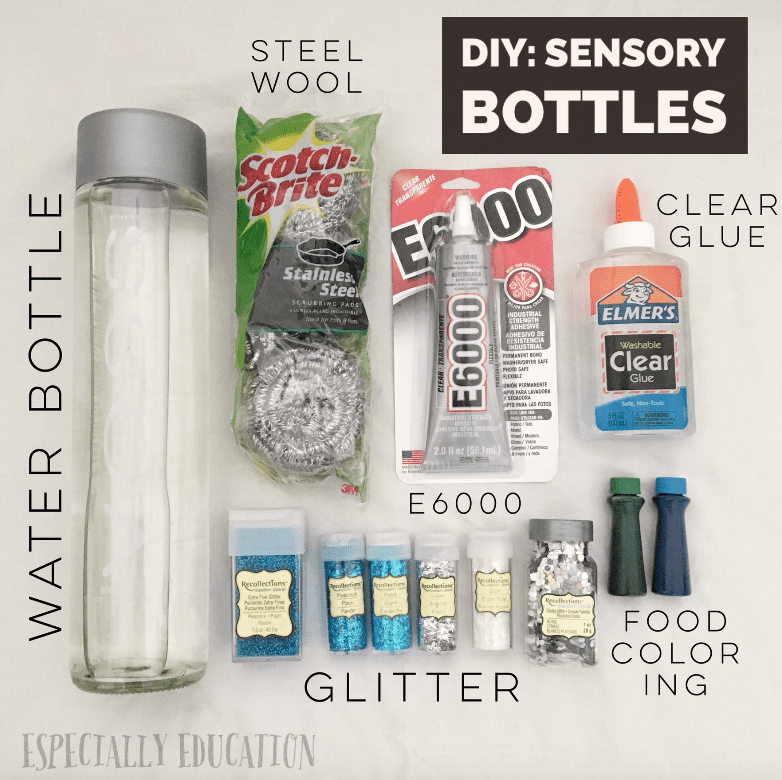
DIY Glitter Sensory Bottle – Materials
• Water bottle (I used glass Voss bottles, basically because they are beautiful. You can use plastic, too)
• Steel wool (to remove the Voss logo)
• Glitter (is there such a thing as too much glitter?)
• Clear Elmer’s glue
• Food coloring
• E6000 (to glue the lid shut: although I might use crazy glue on future projects)
• Warm water
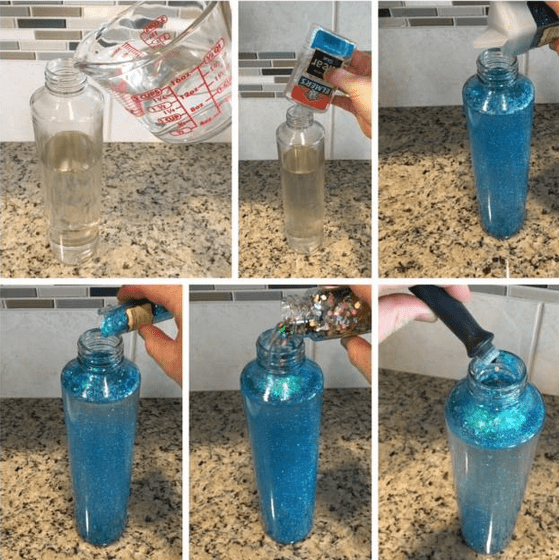
DIY Glitter Sensory Bottle -Instructions
1.) Fill the bottle 3/4 of the way full with warm water
2.) Add clear Elmer’s glue (I used one bottle, but I wish I would have used a bit more. The more viscous your solution, the longer the glitter will suspend.)
3. Add glitter. Lots of glitter.
4. Squeeze a few drops of food coloring into the water.
5. Superglue the lid shut
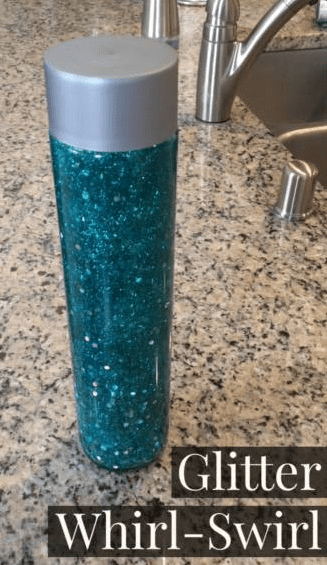
Pros: Very mesmerizing qualities. You can never have too much glitter.
Cons: I found getting the water: glue ratio just right a bit challenging.
The Rockin’ Rainbow – Water Bead Calming Sensory Bottle
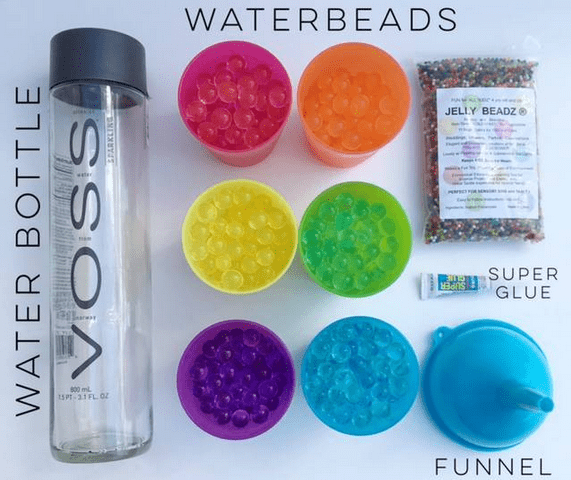
The Rockin’ Rainbow – Water Bead Calming Sensory Bottle -Materials
• Water bottle
• Jelly Beadz (assorted by color)
• Funnel
• Super glue
• Cold water
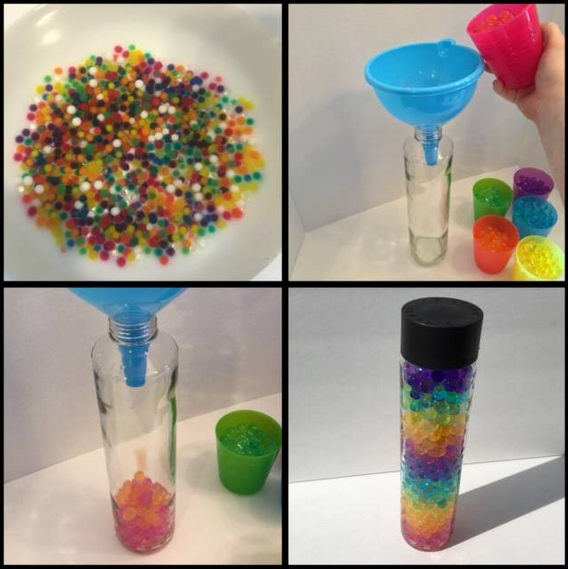
The Rockin’ Rainbow – Water Bead Calming Sensory Bottle – Instructions
1.) Sort your beads by color and put them into bowls (I made the mistake of waiting until they grew to marble-sized, slippery orbs before I sorted them. Needless to say, that decision quickly made it to the cons list).
2.) Add water and wait several hours until they are full-size
3.) Use a funnel to drop them into the bottle, layering the colors as you’d like
4.) Add water to fill
5.) Superglue the lid
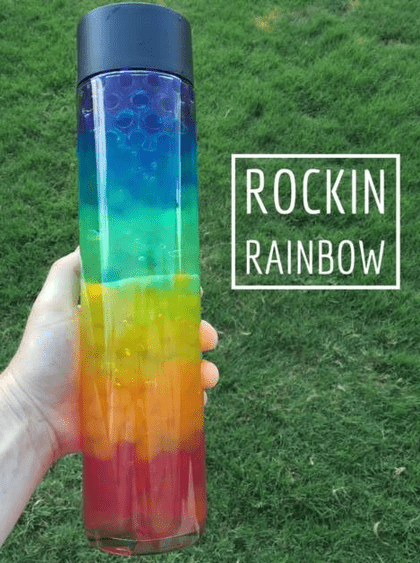
Pros: This bottle is stunning! It is also super fun to plop the beads through the funnel. This would be a fun bottle to make with kids.
Cons: Sorting them by color can be tedious.
Also, I first made my layers too big and could hardly fit all six colors in the bottle. Instead, I dumped them out, made my layers about an inch big, and repeated the pattern.
All That Glitters is Glow – DIY Glow in the Dark Sensory Bottle
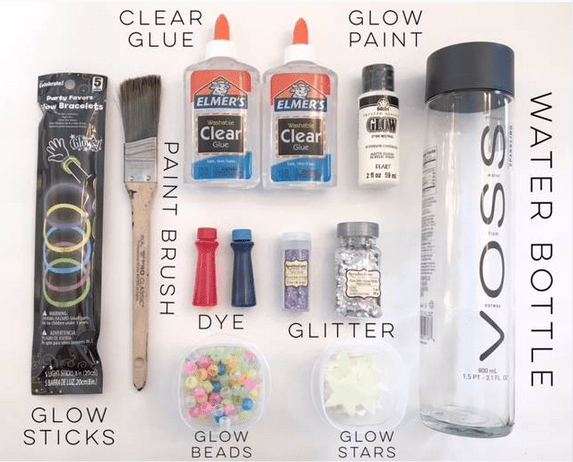
All That Glitters is Glow – DIY Glow in the Dark Sensory Bottle – Materials
• Water bottle
• Clear glue
• Food dye
• Glitter
• Glow paint and brush
• Glow everything: beads, stars, sticks, etc
To put it vaguely, this bottle was very trial and error.
All That Glitters is Glow – DIY Glow in the Dark Sensory Bottle – Instructions
1.) Splatter glow paint on the outside of the bottle (optional)
2.) Follow the steps to make a glitter sensory bottle
3.) Add glow items (I ended up adding a few water beads to mine, too)
Author’s note: If I were to remake this bottle, I would use clear hair gel instead of water/glue solution, nix the food dye, and then add my glow-in-the-dark items.
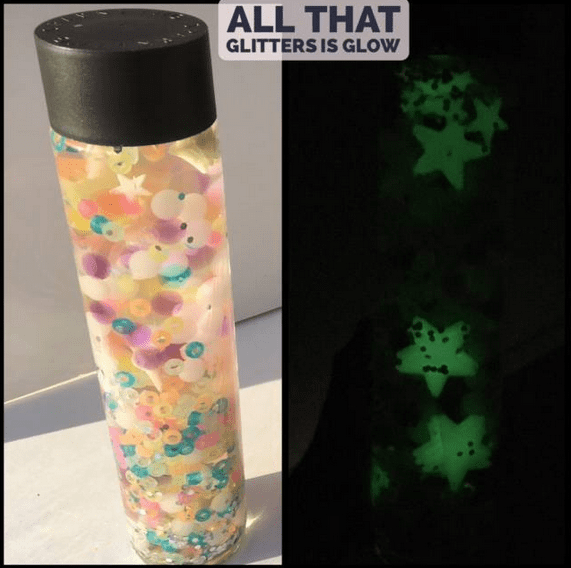
Pros: I love that this glows in the dark!
Cons: The water/glue solution was not very thick, and the beads and stars floated to the top immediately.
And there you have it! Three easy, fun sensory bottles!
Are you on Instagram? Tag @especiallyeducation in your sensory bottle pictures!
Kris Carr says
How many beads did you end up using for each color?
Especially Education says
I don’t remember, Chris, but I bet you find someone who can give you an estimate in our Made For Me Literacy Facebook community.
idk says
Are there any substitutes for food dye?
Michaela Lawrence says
Hi! You could try liquid water colors or tempera paint and see how that works!
Richelle says
you mention hair gel instead of clear glue. any specific kind?
Michaela Lawrence says
I usually just use Elmer’s glue, but I am sure any brand of glue or hair gel would be sufficient!
Shari says
If you fill the Voss bottles with hot water, the labels will peel right off. It will loosen the glue. No steel wool needed. If there is any residue left, just use a little Goo Gone.