The Coronavirus school shutdown has been difficult for children with special needs and their teachers, who have to create distance learning lesson plans. Boom Learning is an innovative interactive website that helps keep children engaged with gamified task cards.


Preschool special education teacher, Rachel Glassman, shows you how she uses Boom Cards by Made For Me Literacy using Google Meet, an iPad, and a computer with her students who are ages 3-5 with varying disabilities.
How I Use Made For Me Literacy Boom Cards
When Michaela and Gabrielle released Made For Me Literacy Boom Cards, I quickly bought them on TPT. During the uncertainty of the Coronavirus Pandemic, I knew I would NEED some special education distance learning lesson plans that were high quality and effective for my preschool special education students. Teaching special education online was going to be a challenge.
And, of course, like all their Made For Me Literacy products available of Teachers Pay Teachers, their Boom Cards were everything I needed and more.
How to Organize Your Made For Me Literacy Boom Cards
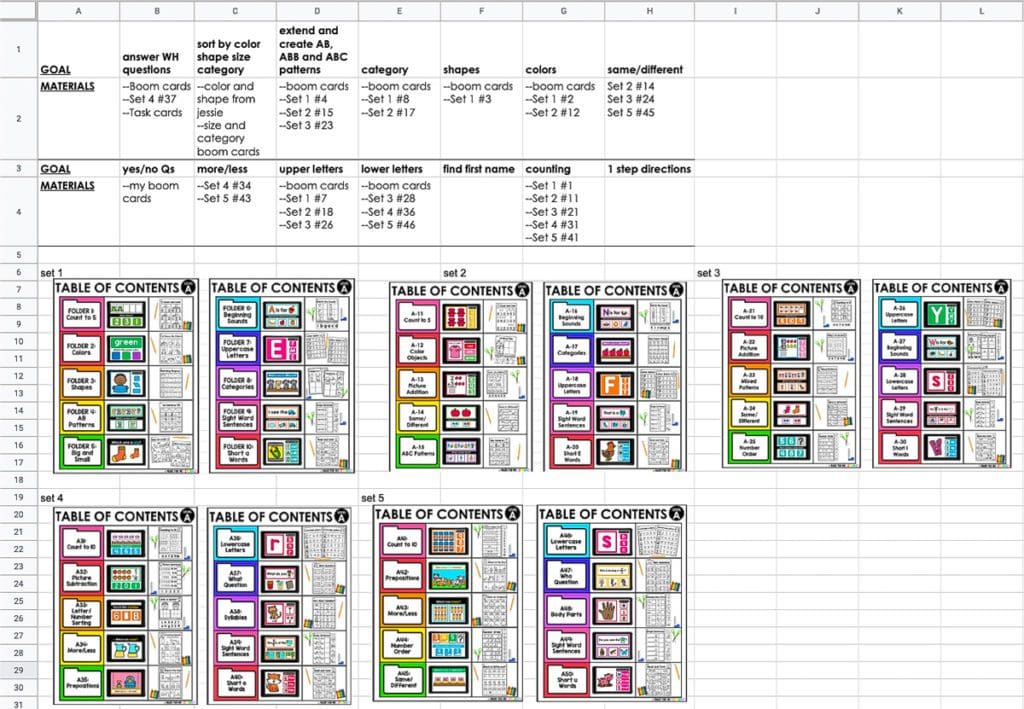
There are SO many BOOM Cards included in the Made For Me Literacy Digital Skill Practice Packs. To effectively plan lessons for my special needs students, I first organized the cards into one place.
I use Google Sheets to plan my groups, so I just inserted screenshots of Michaela and Gabrielle’s product pages with their lists that show which BOOM decks are in each set. (see my image below).
Once I could see all the decks in one place, it took only a few minutes to plan which decks I’d use throughout the week.
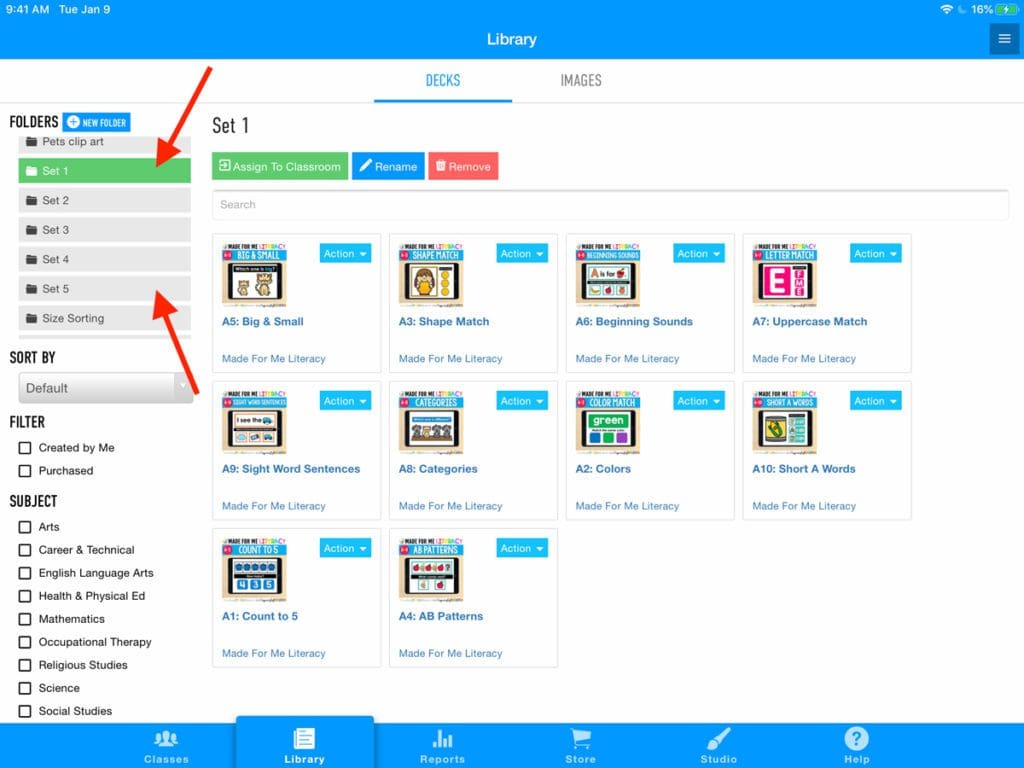
I also made folders in my online BOOM Learning library to organize each deck by set. To do this, go to your BOOM library, click ‘new folder,’ and make a folder for each ‘set.’ Then, drag the BOOM cards from that set into the folder. Now, you can easily access your BOOM decks when setting up your sessions.
Remote Teaching – How to Screen Share Boom Cards
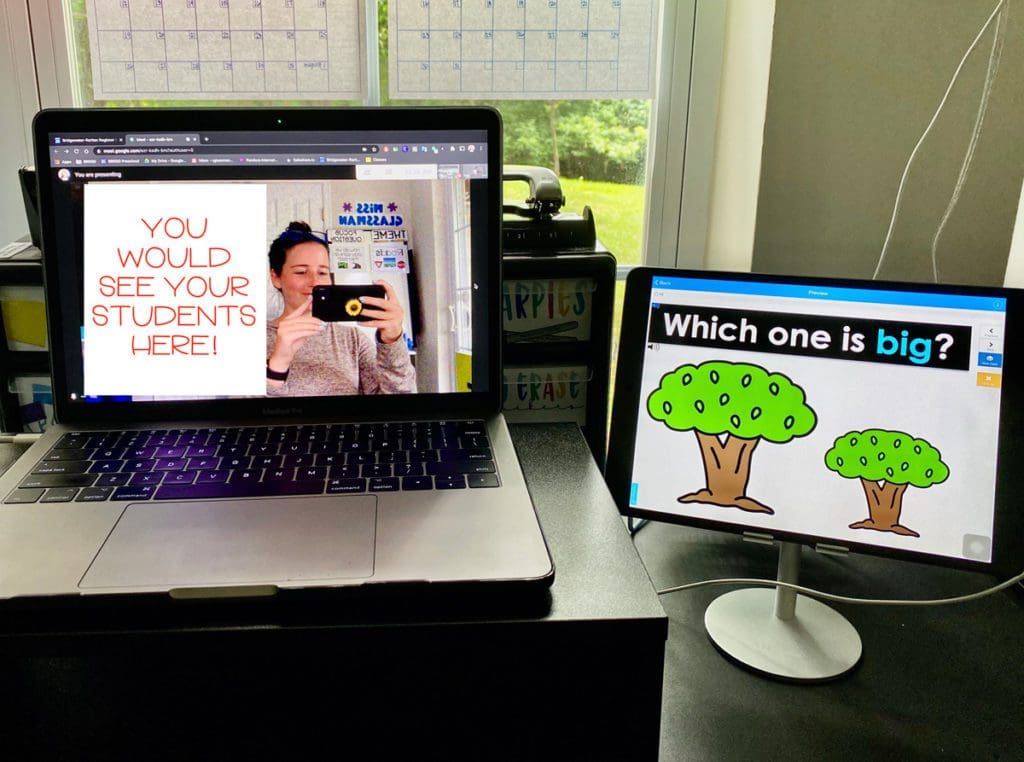
In the beginning, I simply opened the Boom Cards on my computer using Google Meet in Google Classroom and screen-shared them with my students. This was okay and is effective, but having to split my screen to see both the Boom Cards AND my students at one time was frustrating.
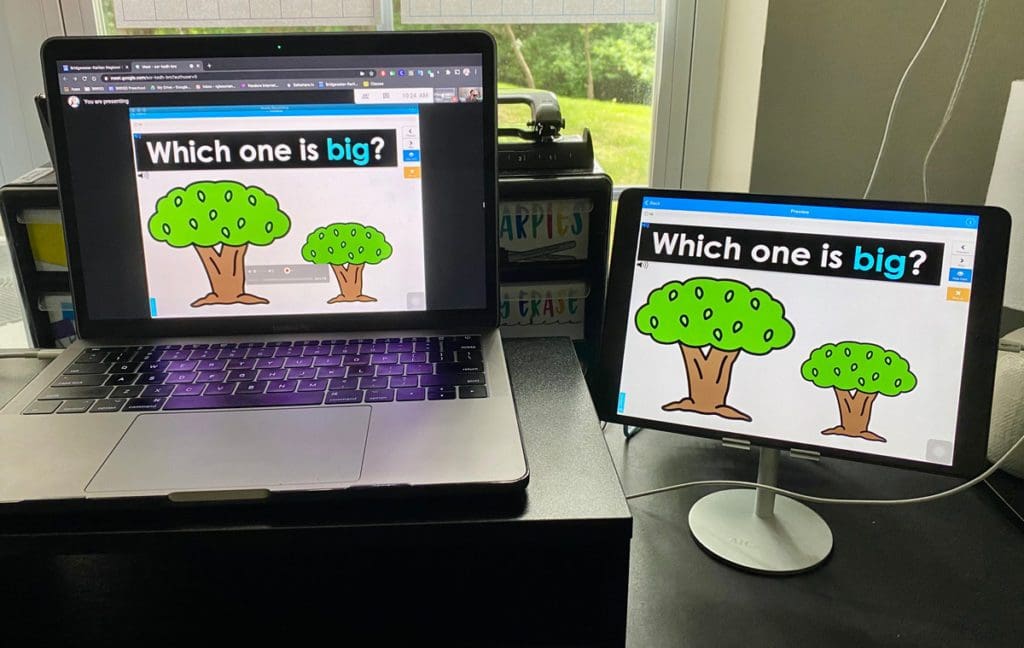
I soon realized I could connect my iPad to my computer. This method will display BOOM Cards in the ‘Boom Cards’ app on my iPad while I have a much better view of my students on my computer screen in Google Meet.
How to Connect an iPad and a Macbook to Use the Boom Learning App
The Tech I Use:
- iPad: iPad Air 3rd gen
- Computer: MacBook Pro 2017 or 2018
- iPad Stand: Any Adjustable Tablet/Phone Stand
- Adapter: USB C to USB Adapter
- Wire: Apple Lightning to USB Cable
*For Macs Only
- Place your iPad on the stand.
- Open the Boom Cards app.
- Select the deck you want to screen share.
- Plug the cord into the adapter and connect your computer to your iPad.
- Open ‘Finder’ on your Mac.
- Double-click’ Applications.’
- Double click ‘Quick Time Player.’
- In the top left of your computer, click ‘file’
- Click ‘new iMovie recording.’
- Next to the record button, there is a dropdown arrow. Click iPad.
- And there you go!
- To screen share, share the QuickTime player window
THE FOLLOWING METHODS WORK FOR A BOTH A MAC AND A PC
As far as I know, you do not need a cord to connect your iPad and your computer for these methods.
Method 1: TeamViewer desktop sharing software
- Download the app TeamViewer to your computer.
- On your iPad, download the app: TeamViewer QuickSupport
- Open TeamViewer QuickSupport on your iPad to get a 9-digit code ‘Partner ID’
- On your computer, open TeamViewer and click ‘Remote Control’
- Under ‘Control Remote Computer,’ put in the ‘Partner ID’ (the 9-digit code from your iPad)
- On the computer, click ‘Connect’
- On the iPad, click ‘Allow’
- It takes a second, but a screen comes up
- On your iPad, click ‘Start Broadcast’
- Choose ‘Start Broadcast’
- It comes in portrait view, but you can rotate it by using the buttons on the bottom of the screen. *You can also make it full-screen using the button in the top left corner.
- When you screen share, choose ‘iPad to screen share
Method 2: Let’s View
- Go to LetsView.com
- Click on the download button
- Download the app ‘Screen Mirroring: LetsView’ on your iPad
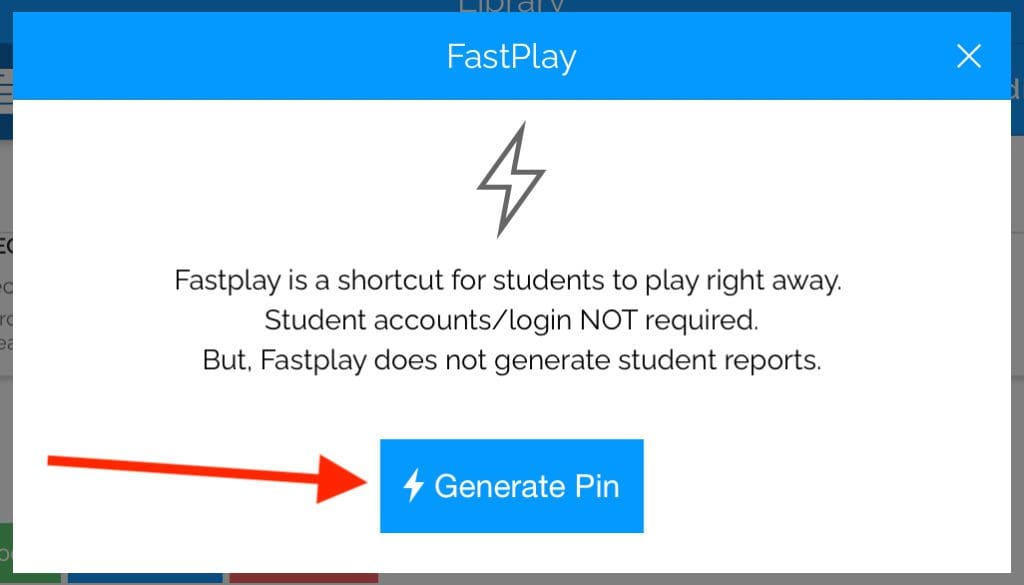
- Once you have both of those downloaded, open them up, and on your iPad, it’ll ask for a pin code. The code is on the top right corner of your laptop (see photo)
- On your iPad, press ‘try pin code’ and type in the code from the computer.
- Once you input the code, it will show how to turn on ‘screen mirror’ on your iPad.
- In screen mirroring, select ‘Let’s View’
- The screen mirroring will pop up on your computer screen
**To make it full screen choose the middle icon in the top right corner that says ‘more.’ Choose ‘full screen.’
To share in Google Meet:
- Open a Google Meet
- Click ‘present’
- Choose ‘share a window’
- Choose the ‘QuickTime Player’ window
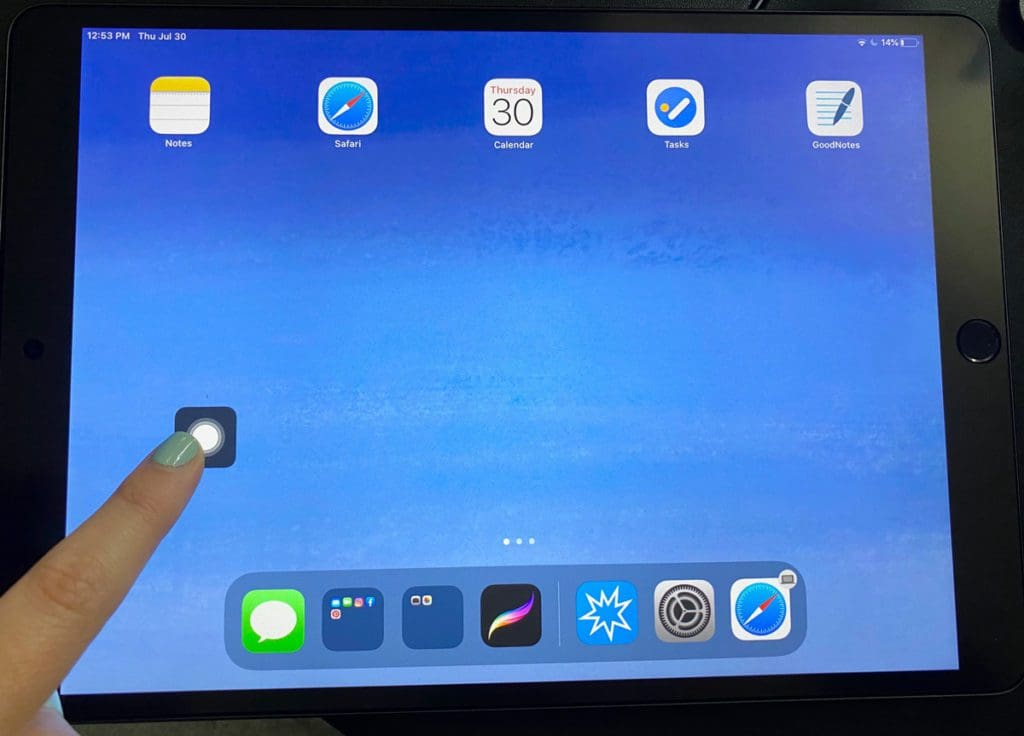
Use Your Finger as a Pointer When Remote Learning With an iPad
In Google Meet and some other platforms, students are not able to click on the screen to indicate their answers. This presents a challenge since we want our students to participate and engage as much as possible. So, I figured out a way to have a ‘mouse pointer’ on my iPad so my students can see what I am pointing to. If they are able to see what I am pointing to, they are able to help me choose the answer. (see videos below)
To Connect Your “Finger Mouse” to Your iPad
Go To: Settings > Accessibility > Touch > Assistive Touch > On
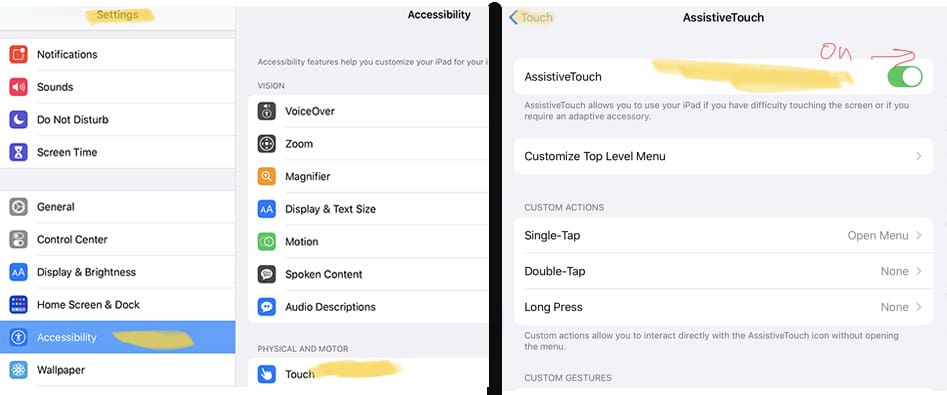
You’ll see the circle on your screen, like the image below, when you’ve changed your settings.
Watch how I have my students interact, engage and choose answers when they can’t use touch the screen!
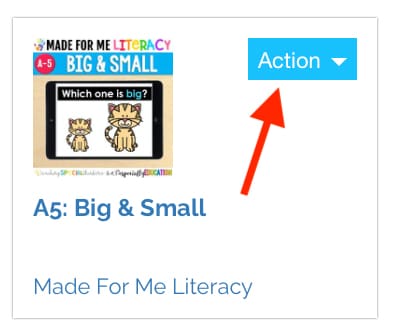
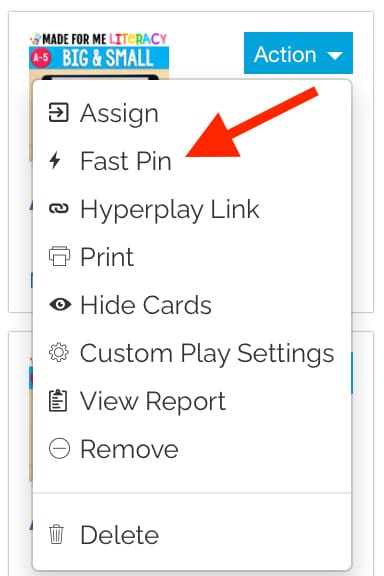
How to Assign Boom Cards in Google Classroom
During distance learning, I have also been assigning these BOOM cards to my students in google classroom. You can share them with your students on any platform. The easiest way to give your students access to BOOM cards is to give them the ‘fast-play’ link that is associated with each deck. The Boom Cards Fast Play link allows them to use the BOOM deck without having to have a BOOM account (SO EASY).
How Can We Use Boom Cards When We’re Back in the Classroom?
Hopefully, we won’t be distance learning forever, so how can you use these in the classroom? I have a few recommendations…
Technology center: You can add a technology center to your center rotations. Students can use iPads or computers in the technology center to complete BOOM cards.
Small groups: I would TOTALLY still use these in my small group lessons back in the classroom. My students are LOVING how engaging and fun they are, so why not? I would either use BOOM cards for the entire small group time OR do one deck at the end of a small group as a reward.
Large groups: My class loves coming together on the carpet for large group lessons. If I was using BOOM cards during a large group lesson, each student would take a turn going up onto our special ‘stage’ (a bench) to answer a question on the SmartBoard.
Early finishers: If students finish their ‘must-do’ work early, BOOM cards are a GREAT early finisher activity.
Last but not least, did I mention these BOOM cards all have automatic sound AND that they are self-correcting!!?? YUP! So, depending on your student’s level of independence, they really can complete these with minimal assistance.
The automatic sound reads the students the question or the prompt that they need to complete. The self-correcting feature indicates when the student hits the wrong answer and does not let them move on until they touch the correct answer.
Leave a Reply