
Here at Especially Education, we’re often asked about visual recipes. So here is our introduction to visual recipes, their benefits, how to use them, and how to create your own.
What Are Visual Recipes?
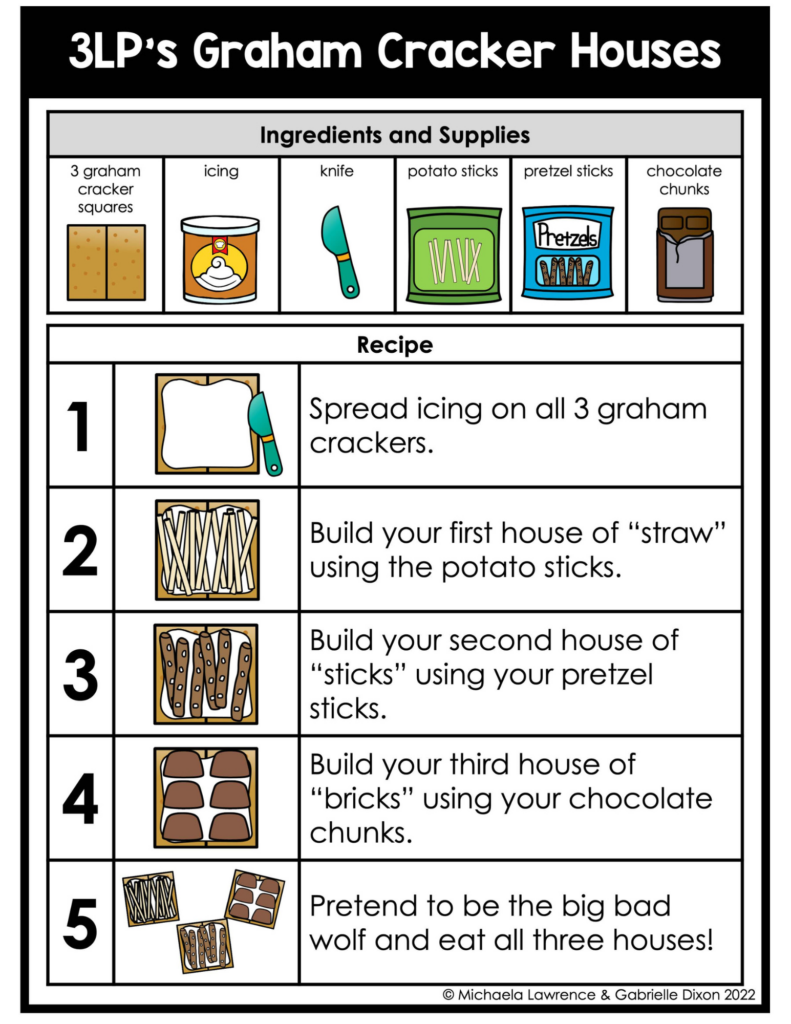
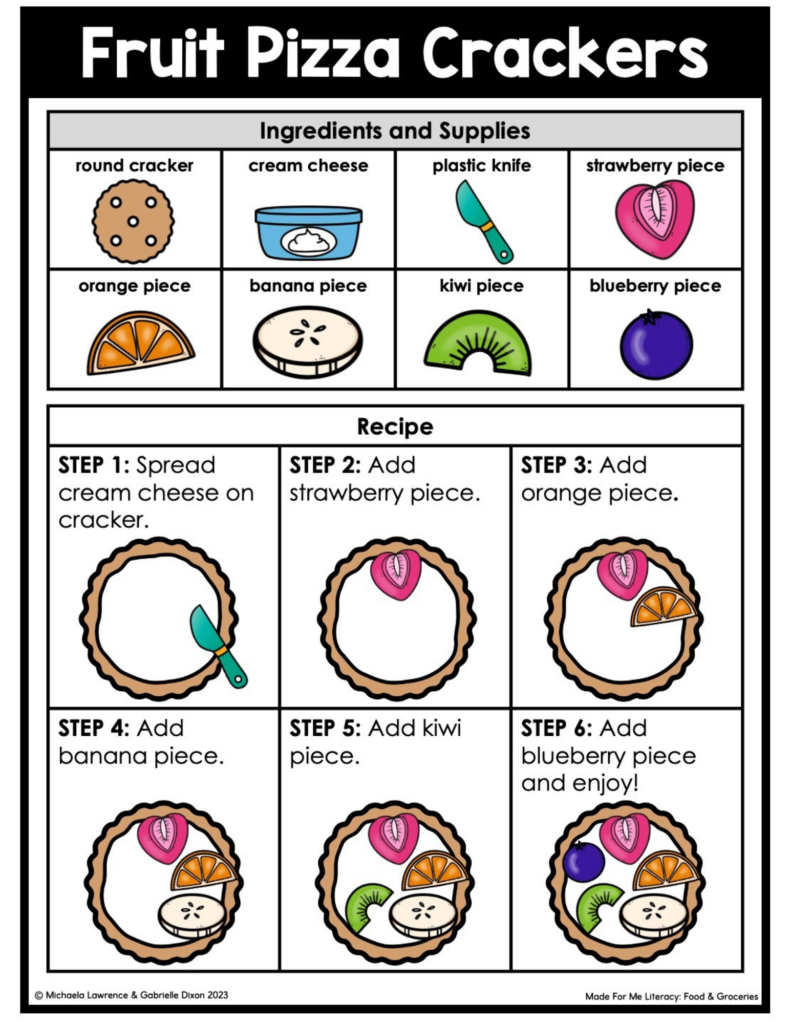
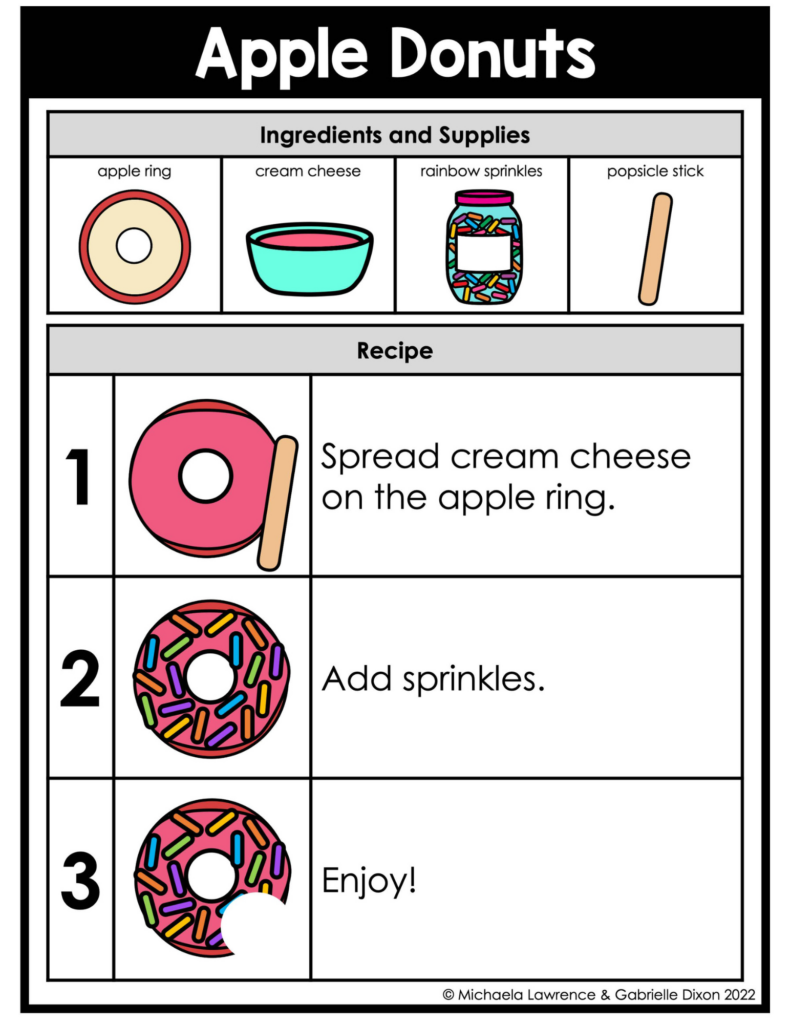
A visual recipe is a kid-friendly recipe presented in a format that includes pictures representing all the tools, ingredients, and actions needed for each step. These visual cues make it easier for children to follow the recipe and understand the process.
You can use visual recipes for cooking or for creating other fun items such as sensory bins, puffy paint, or slime. For the sake of simplicity, we will refer to visual recipes and cooking in this article. However, all of the information is also applicable to other forms of visual recipes.
Visual recipes are especially helpful for individuals with special educational needs, as they provide clear instructions and support language development.
What are the Benefits of Visual Recipes for Children with Special Needs?

For children with special educational needs, visual recipes can:
- Make instructions more accessible: When images or symbols accompany each step in the cooking process, it is easier for children to understand. This is especially true for children with cognitive disabilities because visual recipes simplify what can be complex tasks.
- Encourage language development: The pictures in a visual recipe encourage children to discuss the images, describe the actions, and learn new vocabulary related to cooking. This “language stimulation” aspect makes them especially beneficial for children with language delays, autism, dyspraxia of speech and other similar conditions.
- Make the learning process more inclusive: In classes of varying abilities, visual recipes can level the playing field, allowing all children to actively participate with less supervision and support.
- Aid children with motor development issues: Small, controllable steps are easier to cope with than complex, multi-step processes. Visual recipes can help children with motor challenges feel less overwhelmed by breaking the cooking process down into manageable steps.
- Promote practical life skills: Visual recipes support academic educational goals while developing practical life skills.
- Facilitate a fun activity that can be replicated at home: Sending copies of a visual recipe home can provide a fun activity that the entire family can participate in. This can not only create fun, positive memories but also promote bonding between family members.
How Can I Adapt Visual Recipes for Different Abilities?

Visual recipes are inherently inclusive. However, there are ways to make them more simple or more complex according to a child’s age or abilities.
To begin with, break a recipe down into simple steps, focusing on the critical points such as ingredients, cooking times, and safety precautions.
Next, you can choose visuals according to your students’ abilities. Some children will benefit from detailed, step-by-step images, while others can cope with fewer “overview” pictures. When choosing visuals, always include the recipe’s key points, such as ingredients, cooking times, and safety precautions.
Consider your student’s individual needs. For example, do some children work better with color-coded visuals while others prefer black and white? Do some students benefit from a single card for each step rather than a single sheet with multiple steps? Alternatively, you may want to use photos for some kids and drawn images for others.
When I use visual recipes at home, we use several items of adaptive equipment, including adaptive equipment for our son, who has cerebral palsy. Therefore, I have made a specific set of visual recipes that show the adaptive equipment and how it is used. This helps our budding chef know his needs are important enough to include in our family’s “recipe book,” as well as demonstrating how to use the equipment to anyone who is unfamiliar with its use.
Decide whether to give children their own copies of the recipe, one copy per group, or create a Velcro or magnetic board at the front of the class to display each step.
How Do I Introduce Visual Recipes?

Social stories are an excellent way of introducing visual recipes. Discovering what will happen from beginning to end can engage your students, create anticipation, and offer an opportunity to ask questions before the cooking process begins.
You can introduce visual recipes as part of a wider learning program. For example, our Made for Me Literacy “Fairy Tales” bundle includes four weeks of cross-curricular literacy instruction, incorporating math and science concepts along the way. Each week centers on a different fairy tale, and there is a visual recipe for each one.
Alternatively, consider simple and familiar recipes such as sandwiches, fruit salad, or oatmeal.
Once you are ready to begin cooking, create a safe, organized cooking space with all ingredients, utensils, and support resources in one place. Then, you can introduce the visual recipe and discuss each ingredient, utensil, and action. This is also a good time to review safety precautions.
How Do I Work Through a Visual Recipe?

Once you have introduced the concept and visual supports, it’s finally time to have some fun and get hands-on!
Begin by modeling each step, going through the recipe yourself, and demonstrating each step using clear, concise gestures and verbal clues. At this stage, you can invite a student or two to help with mixing or kneading.
Next, it’s time for your students to enjoy their own hands-on experience. For children who are reluctant, nervous, or have sensory issues that make some steps difficult, you can provide practical support, for example, helping to pour ingredients
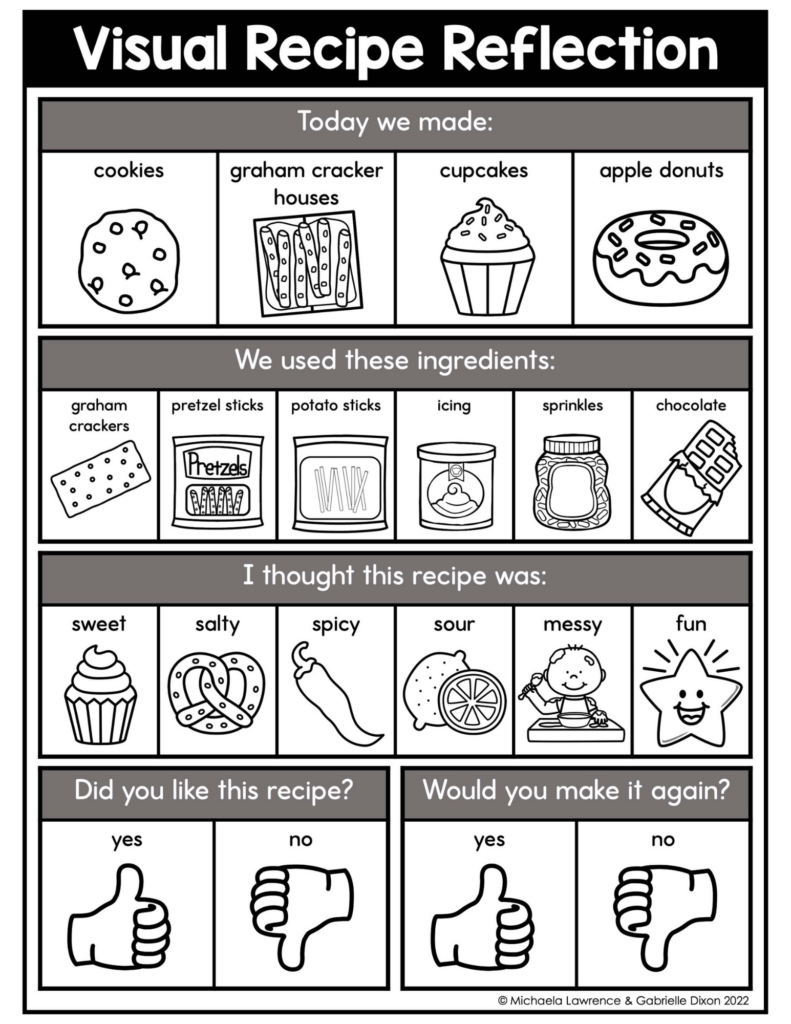
Once your dishes are ready, it’s time to enjoy the results. Sit together and enjoy your food, discussing taste, smell, and texture. After clean-up, you can also use reflection supports such as the one below to facilitate and prompt discussion.
Additional Points
I’ll be writing a second piece about visual recipes, sharing how to involve parents, other family members, and caregivers. However, until then, enjoy using our Made-For-Me-Literacy Visual Recipes. If you develop your own, share them on social media and tag us at @madeformeliteracy and @especiallyeducation. We love to see you all in action!
Leave a Reply