If you’ve been pinterest-ing “cute classroom decor” lately (which I’m sure you have been), you’ve probably come across these super adorable DIY curtains.
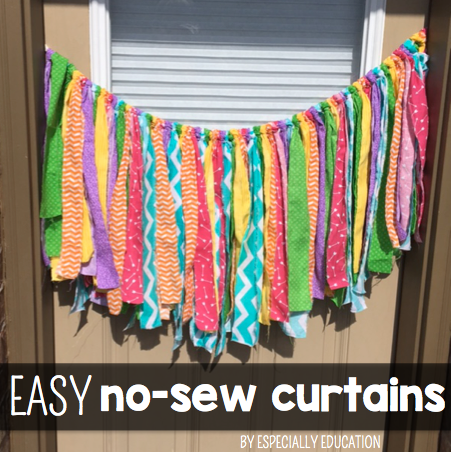
And the best part? No sewing necessary!
Aside from the poodle skirt I was forced to sew in 4th grade, I’ve successfully managed to steer clear of all sewing machine contact since 1998. (My mom threatened “no Halloween” that year unless I at least attempted to use the sewing machine)*
But since these curtains turned out pretty cute and were actually easy to make, I’ve decided to make a pic-torial**
A picture tutorial. That’s a thing, right?
 |
 |
 |
 |
 |
 |
 |
 |
 |
Here are your step-by-step instructions for no sew curtains:
Step 1: Buy fabric.
I chose to do my curtains in neon-rainbow (surprise, surprise). I chose 6 colors and bought a yard of each. JoAnn’s Fabric and Craft store has a teacher discount, so be sure to check that out.
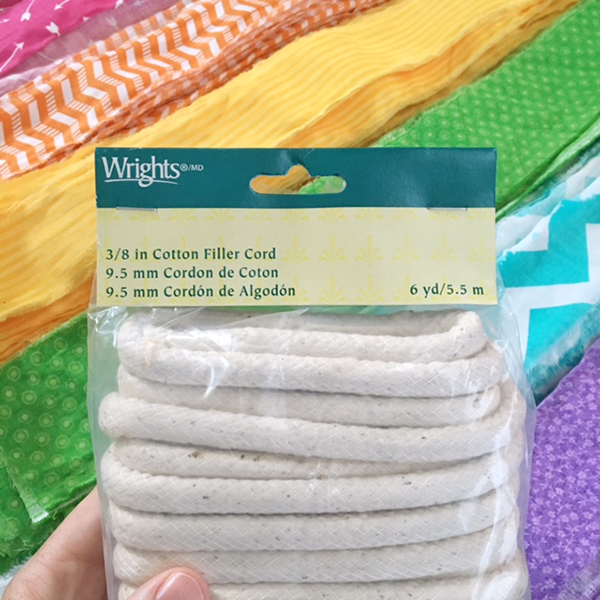
You also need to grab some rope. I grabbed 6 yards of “Cotton Filler Cord.”
If you’re not looking to purchase multiple different fabrics, find one pattern/color that you like and use that. I LOVE how Diana from That Teacher Wife used puzzle piece fabric to support autism awareness!
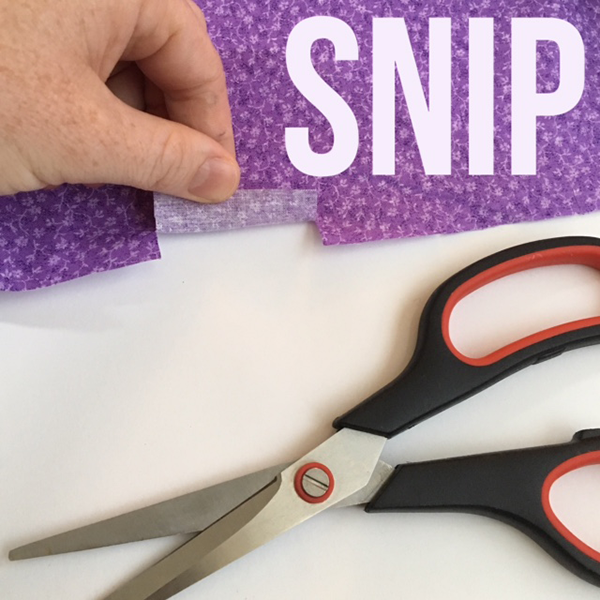
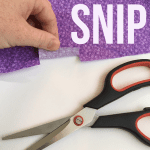
Step 2: SNIP.
Determine how wide you want your fabric strips. I made mine about an inch and a half. Take scissors and snip the fabric every 1.5″ or so.
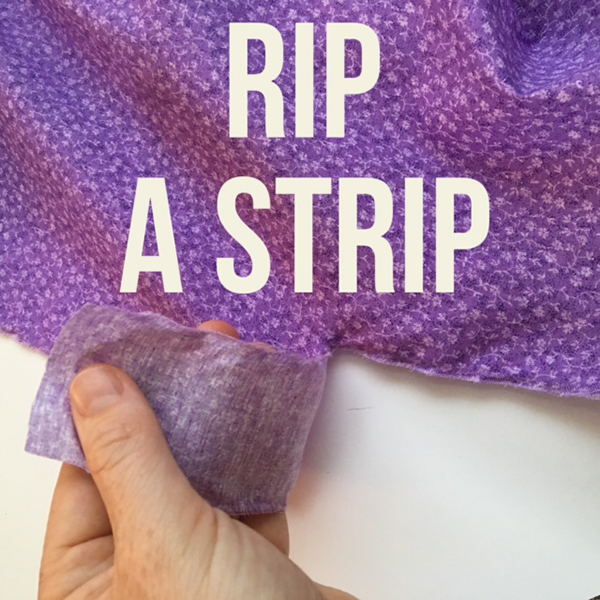
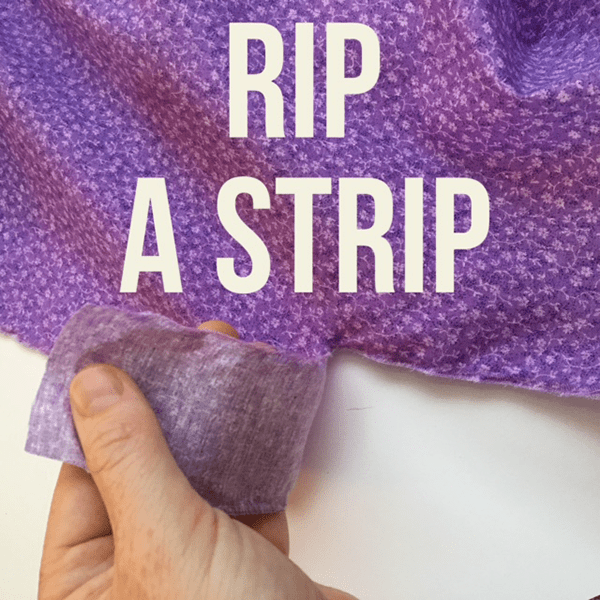
Step 3: RIP.
Rip the fabric all the way across. Remove any excess strings.
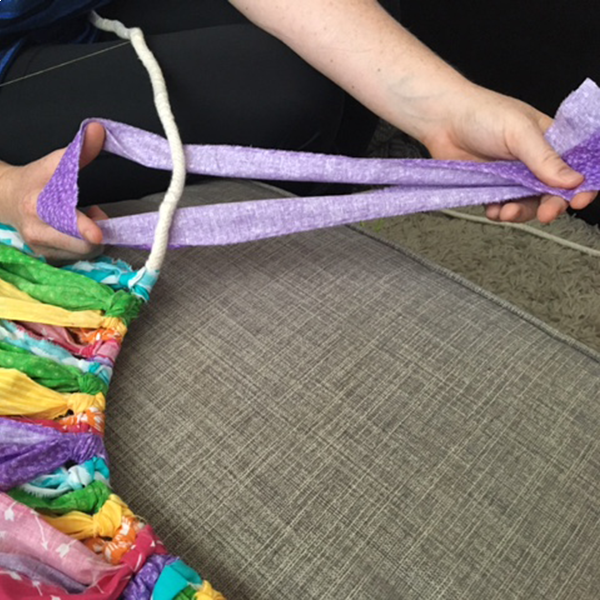
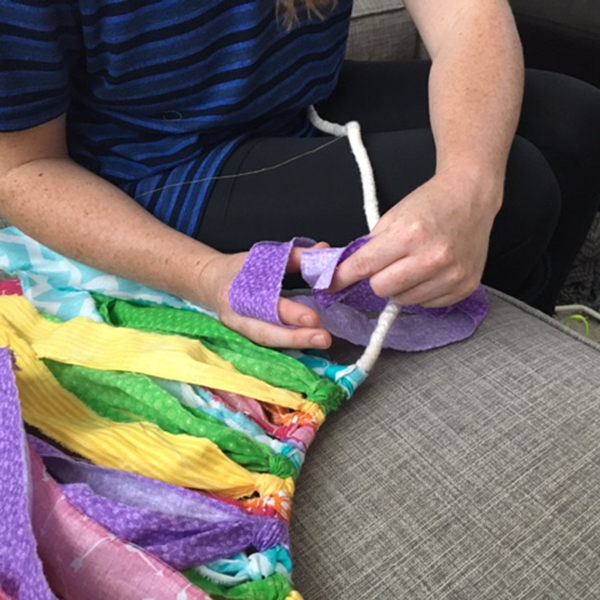
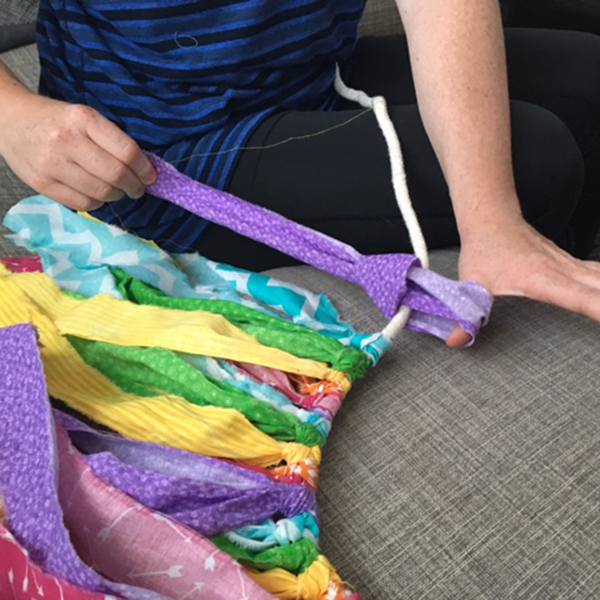
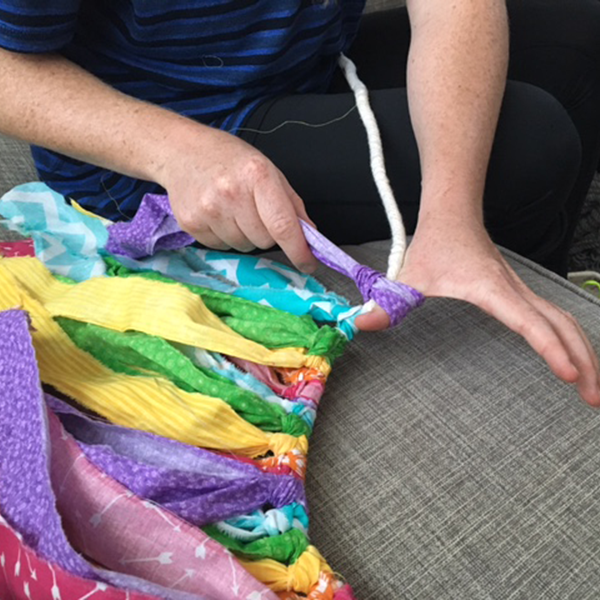
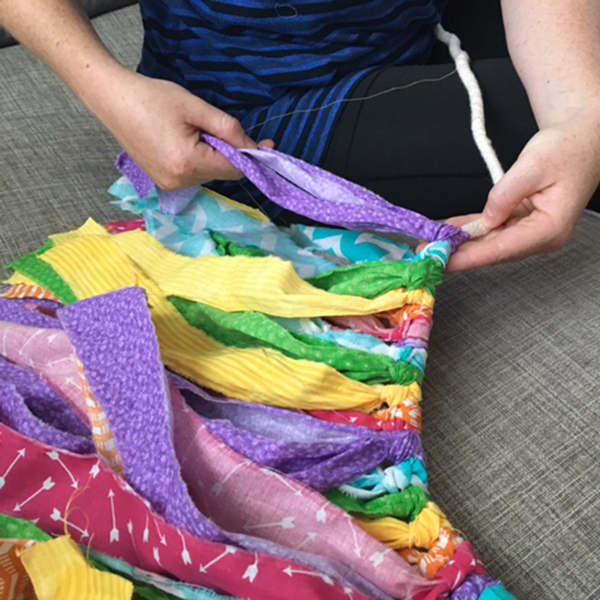
Step 4: Tie the knot.
It took me about six knots before I perfected this technique, so don’t get discouraged. This knot is very similar to the Topsy Tail trend of the 90’s (another thing I’ve managed to avoid since 1998).
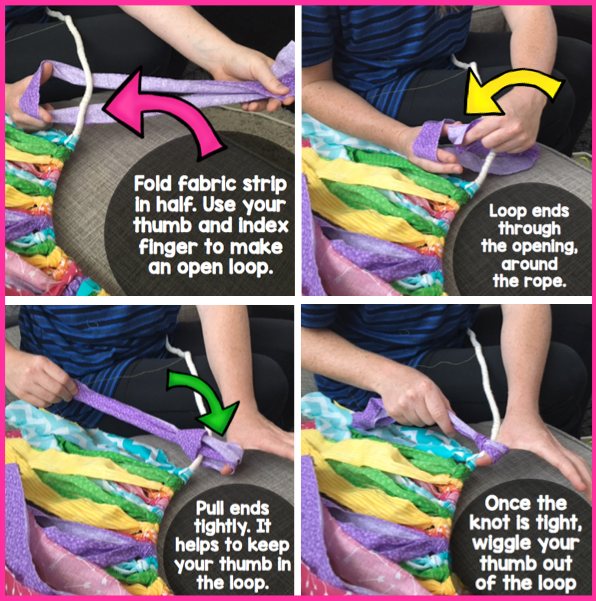
Repeat this process until you’ve reached the end of your rope.
…or desired rope length, whichever comes first.
Be sure to leave enough extra rope at both ends to hang the curtains.
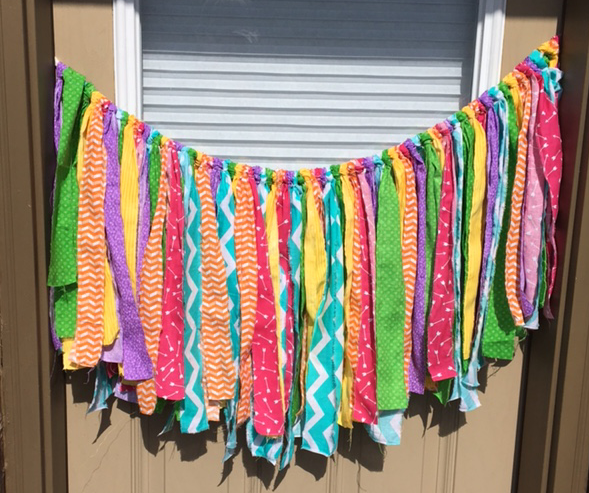
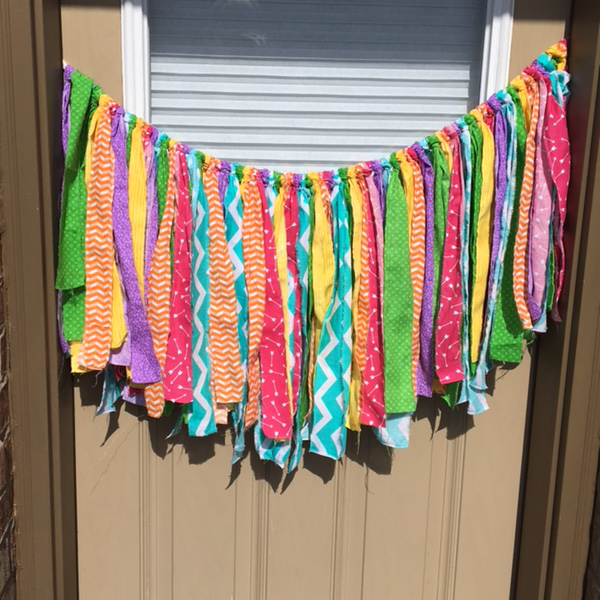
We are still not allowed in our classrooms, which is why I had to settle for a picture in the back yard instead.
And there you have it! Easy, no-sew curtains that brighten up any classroom!
Get more decor ideas to make your classroom special and inviting in this blog, “How to Make Your Classroom More Inclusive.”
Happy Crafting!
Michaela
*Author’s note: my mom is actually super nice. I’m sometimes known to be a bit dramatic from time to time. But very rarely. Practically almost never.
** A huge shout-out to my super wonderful boyfriend, Matt, who always helps me code and format my blog posts. He’s a computer genius!

Alma Vaca says
Thanks for this DIY tutorial. These DIY curtains are a perfect weekend project to start together with the kids to foster their creativity. 🙂